Polishing
Digital Stills from a Camcorder
by Jonathan Byron
Most new camcorders can take still pictures and store them on tape or a
removable card. The idea of a multi-function camera is attractive,
but the convienence comes at a price: camcorder images are usually
not as clear as images from a digital camera designed to take
stills. This brief article shows how to polish camcorder stills in
3 easy steps, using the Image Analyzer program.
Understanding the Problem:
Part of the problem with camcorder stills can be blamed on the ancient
television standards that have survived to this day. In the early
days of television, the electronics to control picture tubes was
primitive. To deal with slow electron guns in picture tubes,
the NTSC and PAL systems painted every other line (a half frame) and
then came back to paint the other half. Because the picture tube
phosphors continue to glow for a fraction of a second after they are hit
by the electron gun, this presents a pretty good illusion of
motion. But freeze a video frame, and you will see interlace noise
that detracts from the picture.
To get the best pictures from a camcorder, use the highest resolution
setting that is available. The pictures will take up more space, but
large memory cards are innexpensive. My 256 MB card costs well
under $100, and can store over 400 stills (1.6 Megapixel, fine
resolution). Use progressive mode for stills if your
camcorder has this feature.
3 Easy Steps In ImageAnalyzer
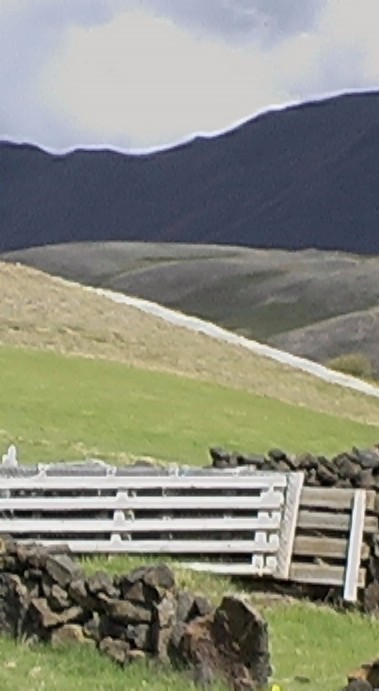
Below is a corner of a raw image taken from my camcorder: You
can see visible artifacts of the interlacing - the horizontal line noise
is quite apparent. But this can be minimized with a de-interlace filter like the one in
ImageAnalyzer.
Raw Image
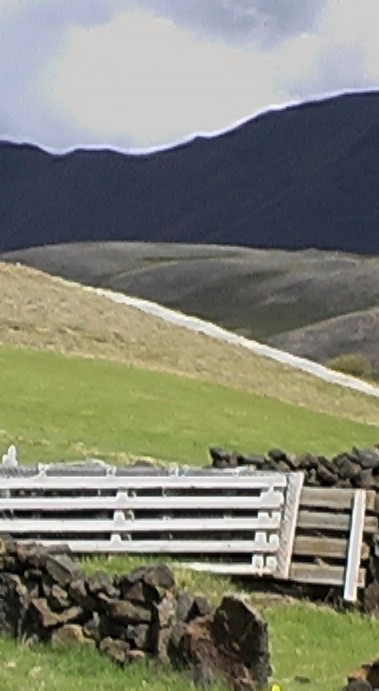
Deinterlaced Image
You can see that the line pattern is greatly reduced, especially on the
mountain ridges and on the fence. So far, so good.
But the image is still less than it could be. There is a fair
amount of speckle noise, and the colors seem somewhat dull and lifeless
(maybe that was the camera, or maybe that was the photographer).
Again, a click or two in ImageAnalyzer can fix that. The adaptive noise filter can remove
speckle noise, and the auto color
correction operation will turn up the color on images that seem
bland or washed out.
The adaptive noise filter can be thought of as a smart smoothing filter
- it only averages out a pixel if that pixel is very different from its
neighbors. Choosing a smaller neighborhood usually will usually
cause more smoothing, while a larger neighborhood (5x5 or 7x7) will
preserve more texture. As a rule, I prefer the 5x5, but the best choice
will vary from image to image.
The auto color correction is a very simple operation (from the user's
standpoint) - there are no options to consider. Just click on the
button and see if it improves your image. It usually makes the
colors more vibrant, but if you don't like the effect, just undo
(ctrl-z).
Adaptive Noise Removal
Auto Color Correct
The mountain is smoother, the grass is greener. The picture is better.
These simple steps also reduced the size of the file by about 20% - the
noise that was eliminated can be thought of as useless information that
is not needed or wanted. So get rid of it, and improve your
images!